How do I clean the items in my camping repair kit?
Camping is a thrilling outdoor activity that allows us to connect with nature and unwind from the hustle and bustle of daily life. However, just like any other adventure, it comes with its fair share of challenges. One of the most crucial aspects of a successful camping trip is having a well - maintained camping repair kit. As a supplier of high - quality camping repair kits, I understand the importance of keeping these items clean and in good working condition. In this blog, I'll share some practical tips on how to clean the various items in your camping repair kit.
Cleaning the Tools
Multi - Purpose Knife
The multi - purpose knife is a staple in any camping repair kit. Over time, it can accumulate dirt, grime, and even rust, especially if it has been exposed to moisture. To clean it, start by disassembling the knife if possible. Use a soft brush or an old toothbrush to scrub away the dirt from the blade and the joints. For stubborn grime, you can soak the parts in a solution of warm water and mild dish soap for a few minutes. After soaking, rinse the parts thoroughly with clean water and dry them completely with a clean cloth. To prevent rust, apply a thin layer of mineral oil or knife oil to the blade and the moving parts.

Pliers and Wrenches
Pliers and wrenches can also get dirty during use. Similar to the knife, use a brush to remove any dirt or debris from the surfaces. If they are greasy, you can use a degreaser. Apply the degreaser to a cloth and wipe the tools down. Make sure to rinse them well if the degreaser requires it and dry them completely. Lubricate the moving parts of the pliers with a light machine oil to ensure smooth operation.
Screwdrivers
Screwdrivers are prone to getting dirty tips. Use a small wire brush or a nail file to clean the tip of the screwdriver. If there is any sticky residue, you can use rubbing alcohol on a cloth to wipe it off. After cleaning, check the handle for any signs of wear or damage. If the handle is loose, you may need to tighten the screw or replace it.
Cleaning the Repair Materials
Adhesives and Glues
Adhesives and glues can dry up and become messy if not stored properly. If you notice any dried glue on the tube or the nozzle, you can use a solvent recommended by the manufacturer to clean it. For example, some rubber - based glues can be cleaned with acetone, but make sure to test it on a small, inconspicuous area first. After cleaning, wipe the tube or container with a clean cloth and store it in a cool, dry place to prevent premature drying.
Patches and Tapes
Patches and tapes are essential for fixing tears and punctures. To clean them, use a soft, damp cloth to gently wipe the surface. Avoid using harsh chemicals or abrasive materials as they can damage the adhesive. If the patches or tapes are sticky on the back and have picked up dirt, you can carefully peel off the top layer of dirt and then store them in a clean, sealed plastic bag.
Cleaning Specialized Items
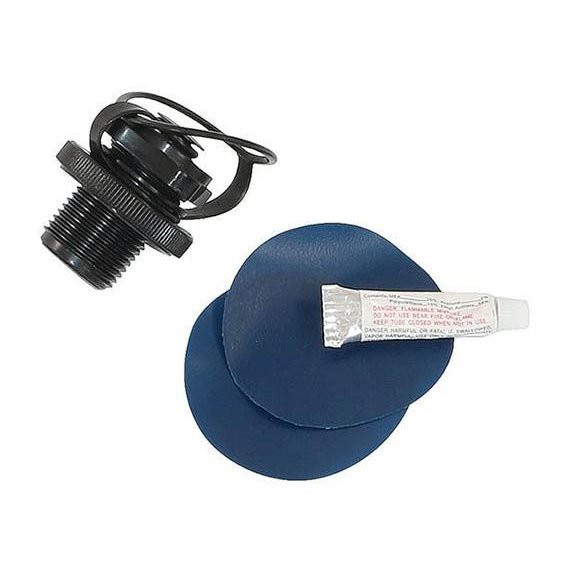
Inflatable Camping Bed Repair
Inflatable camping beds are a popular choice for campers, and their repair items need special attention. If you have a repair kit for an inflatable bed, such as a patch and glue set, make sure to keep the patch clean. Wipe it with a dry cloth to remove any dust. The glue should be stored in a cool place, and the applicator should be cleaned after each use. If there is any glue residue on the applicator, use a solvent recommended by the glue manufacturer.
Pole Repair Sleeve
Pole repair sleeves are used to fix broken tent poles. To clean them, simply wipe them down with a damp cloth to remove any dirt or mud. If the sleeve has a Velcro closure, make sure to clean the Velcro by removing any lint or debris. You can use a small brush to gently clean the Velcro.
Camping Air Bed Puncture Repair
For camping air bed puncture repair kits, which usually include patches and a sealing agent, follow the same cleaning procedures as for the inflatable camping bed repair kit. Keep the patches clean and dry, and make sure the sealing agent is stored properly. Clean the applicator for the sealing agent to prevent clogs.
Storage and Maintenance
After cleaning all the items in your camping repair kit, proper storage is key to maintaining their cleanliness and functionality. Use a waterproof and durable storage case to keep the items organized. Make sure to label the compartments if possible, so you can easily find what you need. Store the kit in a cool, dry place away from direct sunlight. Regularly check the kit for any signs of damage or wear and replace any items that are no longer in good condition.
Conclusion
A clean and well - maintained camping repair kit is essential for a successful camping trip. By following these cleaning tips, you can ensure that your repair kit is always ready to tackle any issues that may arise during your outdoor adventures. As a camping repair kit supplier, I am committed to providing high - quality products that meet the needs of campers. If you are interested in purchasing our camping repair kits or have any questions about our products, please feel free to contact us for further discussions. We look forward to serving you and helping you make your camping experiences even better.
References
- Outdoor Gear Maintenance Guide, published by Outdoor Enthusiast Press
- Camping Repair Kit Manufacturer's Manuals