How easy is it to assemble a camping lantern?
When it comes to camping, a reliable lantern is an essential piece of equipment. It provides light during the dark hours, enhances safety, and adds a touch of comfort to your outdoor experience. As a camping lantern supplier, I often get asked about how easy it is to assemble these lanterns. In this blog post, I'll share insights based on the different types of camping lanterns we offer and provide a detailed guide on the assembly process.
Types of Camping Lanterns We Offer
We have a diverse range of camping lanterns to meet the varying needs of campers. Here are some of our popular models:
- Usb Lightweight Camping Lantern: This lantern is designed for portability and convenience. It can be easily charged via USB, making it a great option for those who want a reliable light source on the go. Usb Lightweight Camping Lantern
- Solar Rechargeable Camping Lantern: Harnessing the power of the sun, this lantern is eco - friendly and cost - effective. It stores energy during the day and provides light at night. Solar Rechargeable Camping Lantern
- Rechargeable Led Lantern Light: With its long - lasting LED bulbs, this lantern offers bright and efficient lighting. It can be recharged using a power source, ensuring you have light whenever you need it. Rechargeable Led Lantern Light
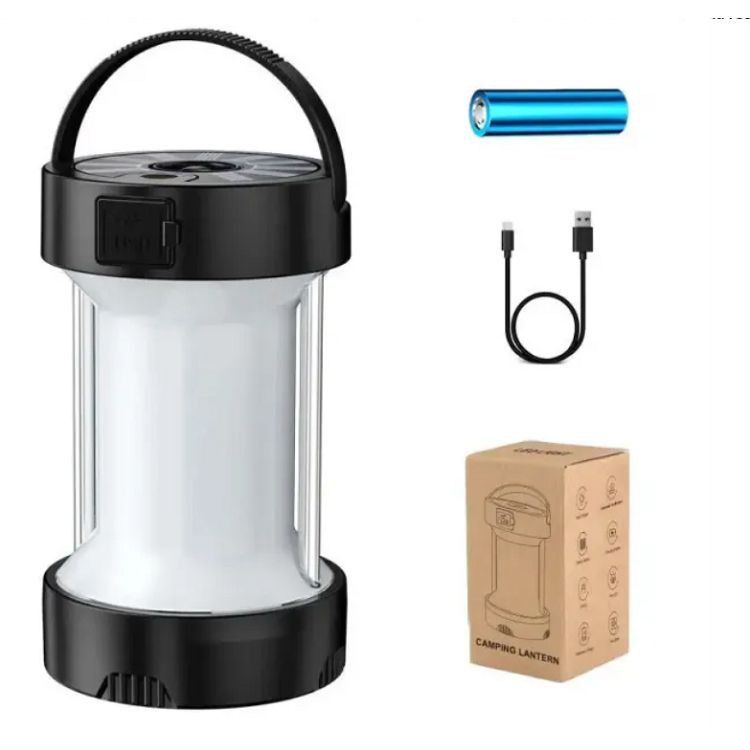
General Assembly Process
The assembly of camping lanterns is generally straightforward, and most people can complete it without professional help. Here is a step - by - step guide on how to assemble a typical camping lantern:
Step 1: Unpacking
When you first receive your camping lantern, carefully unpack it from the box. Check for all the components listed in the user manual. This usually includes the lantern body, batteries (if required), bulbs, and any additional accessories such as hooks or stands.
Step 2: Battery Installation (if applicable)
For lanterns that use batteries, open the battery compartment. Most lanterns have a clear indication of the correct battery orientation. Insert the batteries according to the + and - signs. Make sure the batteries are firmly in place to ensure proper electrical contact.
Step 3: Bulb Installation
If the lantern requires bulb installation, handle the bulbs with care. Some lanterns come with pre - installed bulbs, but for those that don't, gently insert the bulb into the socket. Turn the bulb clockwise until it is securely in place. Avoid over - tightening, as this could damage the bulb or the socket.
Step 4: Attaching Accessories
If your lantern comes with accessories like a hook or a stand, attach them as instructed. Hooks are usually used for hanging the lantern, while stands can be used to place the lantern on a flat surface. For example, if you have a hook, there may be a small hole or slot on the lantern body where you can attach it.
Step 5: Testing
Once the assembly is complete, turn on the lantern to test if it is working properly. If it doesn't light up, double - check the battery installation and the bulb connection.
Assembly Difficulty Based on Lantern Type
Usb Lightweight Camping Lantern
The assembly of a USB lightweight camping lantern is extremely easy. Since it doesn't require battery installation in the traditional sense (it can be powered via USB), the main steps involve unpacking and ensuring that the USB port is accessible. There are usually no complex components to assemble. You can simply plug it into a USB power source, and it's ready to use.

Solar Rechargeable Camping Lantern
The solar rechargeable camping lantern is also relatively easy to assemble. The main difference is the solar panel. You need to make sure the solar panel is properly attached to the lantern body. This often involves aligning the connectors and securing them. Once attached, place the lantern in a sunny spot during the day to start the charging process. The rest of the assembly steps are similar to other lanterns, such as checking the battery compartment (if it has a built - in battery) and bulb installation.
Rechargeable Led Lantern Light
This type of lantern may have a slightly more involved assembly process. In addition to the basic steps of battery and bulb installation, it may have a charging port and a control panel. Make sure you understand how to use the control panel to adjust the light settings, such as brightness levels. The charging port needs to be protected from water and debris, so ensure it is properly covered when not in use.
Tips for Easy Assembly
- Read the Manual: Always read the user manual carefully before starting the assembly. It provides specific instructions for your lantern model and can help you avoid common mistakes.
- Keep Small Parts Together: As you unpack the lantern, keep small parts like screws and washers in a small container. This prevents them from getting lost.
- Use the Right Tools: Some lanterns may require a small screwdriver or other tools for assembly. Make sure you have the appropriate tools on hand.
Conclusion
In general, assembling a camping lantern is a relatively easy task. Whether you choose a USB lightweight camping lantern, a solar rechargeable camping lantern, or a rechargeable LED lantern light, following the steps outlined above will ensure a smooth assembly process. With a little bit of patience and attention to detail, you'll have your lantern up and running in no time.
If you're interested in purchasing our high - quality camping lanterns or have any questions about assembly or product features, we'd love to hear from you. Contact us to start a procurement discussion. We can provide you with more information on our products, pricing, and delivery options.
References
- Various user manuals of our camping lanterns.
- Industry standards for camping lantern design and assembly.